Spring Irrigation Startup in Sioux Falls: A Homeowner's Step-by-Step Guide
That first truly warm spring day in Sioux Falls has a way of making people do funny things. After a long South Dakota winter, we’re all desperate to get outside, fire up the grill, and start thinking about a green lawn. It’s tempting to rush down to the basement, crank open the valve to your sprinkler system, and let ‘er rip. We get it. But a hasty spring irrigation startup after months of frozen ground is one of the quickest ways to create expensive, gushing problems. A little patience and a methodical approach will save you a lot of headache, and a lot of water.
Why This Matters in South Dakota
In milder climates, sprinkler startup is a pretty casual affair. Here in the Sioux Empire, it’s a delicate operation. Our winters don’t mess around. The ground freezes solid, several feet deep, and the constant freeze-thaw cycles in late fall and early spring put immense stress on every buried component of your irrigation system. This movement, called frost heave, can shift pipes, tilt sprinkler heads, crack fittings, and damage seals. Your system doesn't just go dormant for the winter; it endures a five-month siege.
Because of this, a proper spring irrigation startup isn't just about turning the water on. It's a systematic inspection to find and fix the damage winter left behind. Simply blasting a column of high-pressure water into a system that might have cracked or separated components is a recipe for disaster. You could be dealing with an underground leak that floods your lawn for days before you notice it, or a geyser shooting up next to your foundation from a burst backflow preventer. Our heavy clay soil, which holds water and heaves significantly, makes these issues even more common. Taking an hour to do it right can prevent a weekend of emergency digging and costly repairs.
Think of it like waking someone up. You don't do it with a firehose. You do it gently. Your irrigation system, after its long winter slumber, deserves the same courtesy. Pressurizing the system slowly, checking each component deliberately, and walking every zone methodically lets you catch small problems before they become big, expensive ones. It ensures your system operates efficiently, waters your lawn instead of the street, and gets through our short but glorious summer without a hitch.
Timing is Everything: When to Start Up Your Sprinklers
Every April, when we get that first 65-degree day, our phones start ringing. Everyone wants their sprinklers on, and they want them on now. We call this "itchy trigger finger" season. While we appreciate the enthusiasm for a healthy lawn, turning your system on too early in eastern South Dakota is a gamble. One late-season hard freeze can be all it takes to freeze the water in the backflow preventer or shallow pipes, causing them to crack. And as any long-time resident knows, a surprise snowstorm in late April or early May is practically a tradition.
The most reliable rule of thumb is to wait until the threat of a hard freeze (several hours below 28°F) has definitively passed. For the Sioux Falls area, our historical average last frost date is around May 5th. We generally recommend waiting until at least the first or second week of May to be safe. If you have new seed or sod that absolutely requires water earlier, you can risk it, but you must be prepared to drain the system if a freeze is in the forecast. This doesn't mean a full professional blowout, but you'll need to shut off the water, open the test cocks on your backflow device, and relieve the pressure.
More important than the date on the calendar, however, is the state of your soil. The ground needs to be thawed completely, at least to the depth of your irrigation lines (typically 8-12 inches). Pressurizing a system while some lines are still encased in frozen soil is asking for trouble. A simple test is to take a long screwdriver and push it into the ground in several areas of your yard. If you can easily push it 10-12 inches deep without hitting a frozen layer, you're likely in the clear. If you meet solid resistance just a few inches down, give it another week of warm weather. Patience is your best tool here; the ground thaws much slower than the air warms up.
Step 1: Locating the Key Components (And Not Breaking Them)
Before you can even think about turning on the water, you need to know what you're looking for. Every residential irrigation system has two critical shutoff points that you must operate correctly. Misidentifying them or handling them improperly can cause problems inside and outside your house.
The Main Irrigation Shutoff Valve
This is the starting point. It’s the valve that separates your home’s domestic water supply from the irrigation system. It's almost always located inside your house to protect it from freezing. The most common locations are: - In the basement, typically in the utility room near where your main water line enters the house. - In a crawl space. - In a utility closet on the main floor if you have a slab-on-grade foundation.
Look for a pipe, usually copper or PEX, that exits through the wall to the outside. On that pipe, you'll find the valve. It will likely be one of two types: - Ball Valve: This is the most common modern type. It has a single lever handle. When the handle is parallel to the pipe, it's open. When it's perpendicular to the pipe, it's closed. Your valve should have been left in the closed (perpendicular) position for the winter. - Gate Valve: This is an older style with a round, wheel-like handle. You turn it multiple times to open or close it (righty-tighty, lefty-loosey). These are more prone to failure than ball valves and can sometimes break in the closed position.
It's crucial to confirm this is the irrigation shutoff, not the main water shutoff for your entire home. If you're unsure, find the main water meter. The irrigation shutoff will be "downstream" from the meter, branching off the main line.
The Backflow Prevention Assembly
Once you've found the valve inside, head outside. Following the pipe that exits your house, you will find the backflow prevention assembly. This is an absolutely essential safety device. Its job is to prevent irrigation water—which can contain fertilizers, pesticides, and soil bacteria—from being siphoned back into your home's drinking water supply. This is a public health requirement mandated by the South Dakota Plumbing Code.
The backflow preventer is typically a brass assembly of pipes and valves that sits above ground. In our area, you’ll most likely have one of two types: - Pressure Vacuum Breaker (PVB): This is the most common residential type. It looks like an upside-down "U" of brass pipe with a plastic cap on top and two smaller ball valves with screwdriver-slot handles. - Reduced Pressure Zone (RPZ): This type is more complex and offers a higher level of protection. It's a wider, bulkier device with three valves (two shutoffs and a relief valve on the bottom) and four test cocks.
Before you turn on any water, you need to ensure the two small test cocks (the screwdriver-slot valves) on the backflow device are closed. They are often left slightly open after a professional blowout to allow any trapped water to drain. Use a flathead screwdriver to turn the slot so it's perpendicular to the small nipple it's on.
Step 2: The Slow Turn-On — Your Guide to a Proper Spring Irrigation Startup
This is the most critical phase of the spring irrigation startup. The number one mistake homeowners make is opening the valves too quickly. This creates a violent pressure surge known as water hammer, which acts like a battering ram inside your pipes. It can crack PVC fittings, burst pipes at the joints, and damage the internal components of your sprinkler valves and backflow preventer. The mantra here is slow and steady.
Pressurizing the Mainline
First, double-check that all your sprinkler controller zones are in the "off" position. You do not want any zones trying to run while you are pressurizing the system. Go to your main irrigation shutoff valve inside the house (the one you located in the previous step). If it's a ball valve with a lever, turn the handle only one-quarter of the way toward the open position. You should immediately hear the sound of water flowing through the pipe and filling the mainline that runs out to your backflow preventer. Be patient and let it fill completely. The sound of rushing water will slow and then stop after a minute or two. This slow fill allows air in the pipe to be gently pushed out, rather than being violently compressed.
Opening the Backflow Preventer
Once the sound of water filling the pipe stops, go outside to the backflow preventer. Inspect it closely for any obvious cracks or winter damage. Now, you’ll open its valves. The sequence is important. - There are two larger shutoff valves on the device, one on the "inlet" side (closer to your house) and one on the "outlet" side (leading to the yard). - Slowly turn the handle for the inlet-side valve to the open position. - You may see a small spurt of water from the top of a PVB or the bottom of an RPZ. This is normal as it pressurizes and seals. However, if it's a continuous, steady leak or spray, shut the water off inside immediately. This indicates a failed seal or internal component that needs professional repair. - Once the device is holding pressure, slowly open the second (outlet-side) valve. You will hear water filling the rest of your system's mainline, pressurizing the pipes all the way up to your underground valve boxes. Again, listen for the sound of rushing water to stop.
Fully Opening the Mainline
After the entire system up to the zone valves has been pressurized and you've confirmed there are no leaks at the backflow preventer, you can go back inside. Now, open the main irrigation shutoff valve the rest of the way. Your system is now fully pressurized and ready for the next step: testing each zone.
Step 3: Walking the Zones and Spotting Winter's Revenge
With the system pressurized, it's time to go on patrol. This is your chance to inspect every single head and find any problems caused by snowplows, shovels, frost heave, or simple wear and tear. You'll need to go to your irrigation controller (usually in the garage or basement) and run each zone manually, one at a time. Don't rely on the automatic program.
The Zone-by-Zone Walkthrough
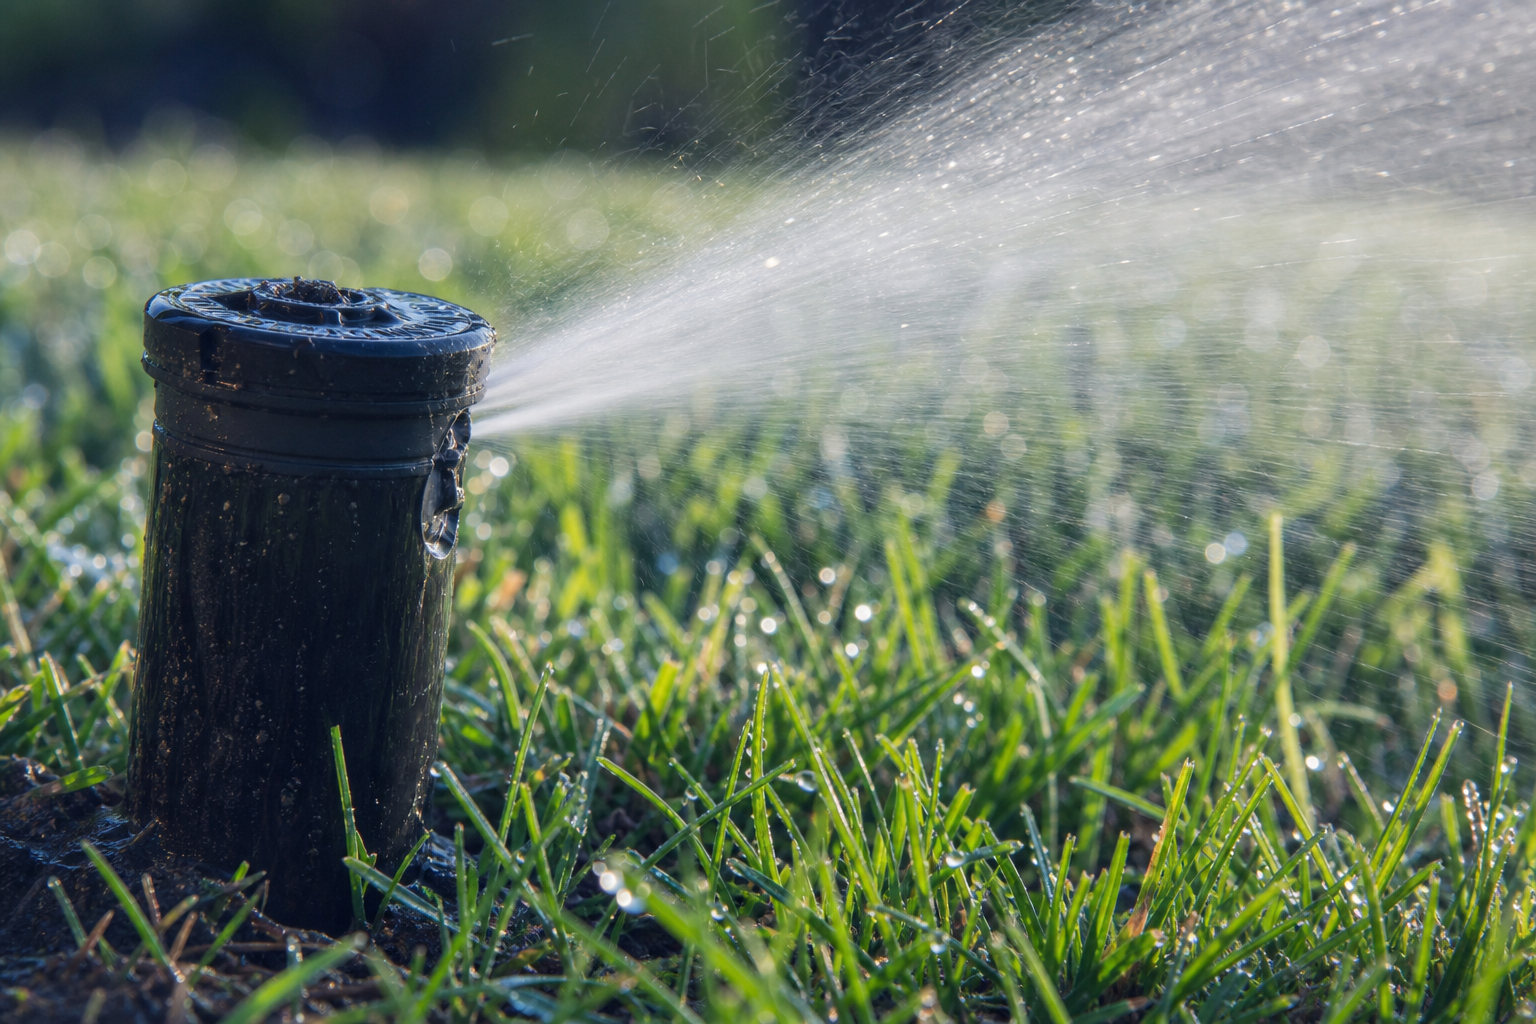
Start with zone one. Turn it on for a few minutes and walk the entire area it's supposed to cover. Keep a small flag marker and a notepad handy to mark any problem spots. You are looking for several specific issues: - Major Leaks: A geyser shooting into the air or water bubbling up from the ground indicates a broken head, a sheared riser, or a burst pipe right at the surface. If you see this, shut the water off immediately to prevent erosion and water waste. - Heads Not Popping Up: This can be caused by a few things. Sometimes grass has grown over the head. More often, the seal is worn out and water is leaking around the base instead of pushing the riser up. It could also mean the nozzle is completely clogged with dirt from the winter. - Heads "Stuck Up": A head that pops up but doesn't retract back down when the zone shuts off is usually full of debris. Sand and dirt get into the riser body, preventing it from sliding down. - Cracked or Damaged Heads: Look closely at the plastic casing of each head. They are easily damaged by lawnmowers, aerators, and especially snowplows along driveways and sidewalks. - Misaligned Spray: Our South Dakota wind is a constant battle. But often, poor coverage is due to a head that's tilted from frost heave or has its spray pattern knocked out of alignment. Look for heads spraying the siding of your house, the driveway, or the street. This is a huge source of water waste. - Misting or Fogging: This is a sign that the pressure is too high for that specific type of nozzle. It atomizes the water, which then evaporates or blows away before it ever reaches the ground. - Weak or Uneven Spray: This could signal a partially clogged nozzle, a head that's set too low, or low pressure in the zone, which might point to an unseen leak elsewhere.
Repeat this process for every single zone in your system. It's tedious, but it's the only way to be sure everything is working as it should.
Common and Easy Fixes
Many of the problems you find can be fixed with basic tools and a trip to the hardware or irrigation supply store. - Cleaning a Nozzle: Unscrew the nozzle from the pop-up riser. Most have a small filter screen underneath that can be rinsed out. Use a small wire or paperclip to gently clear any debris from the nozzle orifice itself. - Adjusting Arc and Radius: Most rotor heads require a special plastic key, while spray heads can be adjusted with a small flathead screwdriver. Twist the riser body to set the left-stop position, then adjust the arc screw on top to change the pattern (e.g., from 90 to 180 degrees). The radius (spray distance) is usually adjusted with a separate screw that breaks up the water stream. - Straightening a Tilted Head: Frost heave often pushes heads over. Carefully dig out the soil on the "low" side of the head, push it back to a vertical position, and pack soil firmly back around it to hold it in place.
Diagnosing Deeper Problems: When a Wrench Isn't Enough
While you can fix many common sprinkler issues yourself, some problems point to deeper, more complex failures. Knowing how to identify these can save you hours of fruitless digging and help you know when it’s time to call in someone with specialized diagnostic tools.
Zone Won't Turn On
You go to your controller, manually start a zone, and... nothing happens. No sound of water, no heads popping up. After confirming the controller is actually sending a signal (most have a light or icon indicating a zone is active), the problem is almost always in the field. - Bad Solenoid: Each zone is controlled by an electric valve, usually grouped together in a green valve box buried in your yard. On top of each valve is a small cylinder with two wires—this is the solenoid. It's an electromagnet that opens the valve. They can burn out over time. You can test this by finding the valve in the box and looking for a "bleed screw" or a manual lever on it. Turning this should manually open the valve. If water flows and the sprinklers run, but it won't work from the controller, you likely have a bad solenoid or a wiring problem. - Broken Wire: This is a very common issue, especially after a long winter. Rodents love to chew on irrigation wires, and freeze-thaw cycles can stretch and snap them. Finding a wire break in a run that could be hundreds of feet long requires specialized tools like a wire tracker and fault locator. This is where DIY stops for most people. - Failed Valve Diaphragm: Less common, but the rubber diaphragm inside the valve can get stuck or tear, preventing it from opening.
Low Pressure Across a Whole Zone
If one specific zone has weak pressure at all its heads, but other zones work fine, you almost certainly have a significant leak somewhere on that zone's pipe. This could be a "sheared" head where the riser pipe below it broke off, or a cracked underground pipe. Your first clue is to look for the wettest, soggiest part of that zone. Look for standing water, unusually green grass, or even mushrooms growing. If you find the spot, digging is required. If the break isn't obvious, finding it can be a real challenge.
Backflow Preventer Leaks
Pay close attention to your backflow device when you turn on the water. A small drip from one of the valve handle packings might be fixable by tightening a nut. However, if you see a constant stream of water coming from the main relief port (on an RPZ) or a steady gush from the top bonnet (on a PVB), do not ignore it. This indicates that the internal seals have failed. These devices are precision-machined and contain springs and rubber O-rings that wear out. Rebuilding them requires specific parts and expertise. More importantly, the South Dakota Plumbing Code requires that all backflow preventers be tested annually by a state-certified tester. If your device is leaking, it will fail this test and legally must be repaired or replaced by a certified professional. This isn't just a rule; it's a critical safety measure for your family's drinking water.
Step 4: Programming Your Controller for a South Dakota Spring
Once your system is mechanically sound, the final step in a successful spring irrigation startup is telling it what to do. Firing up your system with the same watering schedule you used in the 95-degree heat of last August is a huge mistake. It wastes water, stresses your lawn, and encourages shallow, weak roots. Your programming needs to match the conditions of a cool, often wet, South Dakota spring.
Cool-Season Grass Needs
The lawns in our USDA Zone 4b/5a climate are composed of cool-season grasses like Kentucky bluegrass, fescue, and ryegrass. These grasses do most of their growing in the cool weather of spring and fall. In May and early June, they are thriving, but their water needs are minimal. The days are cooler, there's more rainfall, and evaporation rates are low. - Start with less. A good starting point is to water just once or twice per week, for a short duration. - Aim for deep roots. The goal of all irrigation is to encourage deep root growth, which makes a lawn more drought-tolerant. The "deep and infrequent" watering principle is key. A single, longer watering session is better than short, daily sprinkles. As the season progresses and temperatures climb into the 80s and 90s, you will increase the frequency and duration, but always with the goal of soaking the root zone, then letting it dry out.
Factoring in Our Clay Soil
Most of the Sioux Empire is blessed with heavy clay soil. Clay has great nutrient-holding capacity, but it absorbs water very slowly. If you run your sprinklers for 30 minutes straight on a clay lawn, much of that water will simply run off into the street, especially on any kind of slope. - Use "Cycle and Soak." Most modern controllers have a feature called "Cycle and Soak" or "Smart Cycle." This automatically breaks up a long watering time into shorter cycles with a pause in between. For example, instead of watering for 30 minutes straight, it might water for 10 minutes, pause for 30 minutes to let the water soak in, then run for another 10 minutes, and so on. This is the single most effective way to prevent runoff on clay soil.
New Sod vs. Established Lawn
Watering needs are drastically different for new and established turf. - New Sod: Needs to be kept consistently moist for the first 2-3 weeks until its roots begin to knit into the soil below. This is the one time when frequent, light watering (several times per day for 5-10 minutes) is appropriate. - Established Lawn: Follows the deep and infrequent rule. Watering too often keeps the soil surface constantly damp, which encourages fungus, disease, and shallow roots.
Rain Sensors and Smart Controllers
A working rain sensor is non-negotiable. This simple device detects rainfall and overrides your controller, preventing your system from watering when Mother Nature is already doing the job for you. Make sure your sensor is clean and unobstructed. Better yet, consider upgrading to a Wi-Fi-enabled smart controller. These controllers use local weather station data to adjust your watering schedule automatically based on rainfall, temperature, wind, and humidity. They are proven to save significant amounts of water and money, and for our unpredictable climate, they take all the guesswork out of watering.
When to Call a Pro
We're a family business, and we appreciate the DIY spirit. But we've also been doing this for 50 years, and we know when a minor issue can quickly spiral into a major project. You save time, money, and frustration by knowing your limits. It’s time to call a professional for your spring irrigation startup if you run into any of these situations: - You turn on the main valve and hear the sound of rushing water that won't stop, but see nothing happening outside. This points to a major break in the mainline underground. - Your backflow prevention device is leaking steadily or gushing water. By law, these must be repaired and tested by a state-certified technician. We have them. - A whole zone won't turn on, and you've confirmed it's not the controller. Diagnosing wire faults or replacing buried valves is often more trouble than it's worth without professional tools. - You have persistent low-pressure problems that you can't trace to a specific broken head. - You find multiple broken pipes or have damage in a complex area like a valve manifold. - You simply don't have the time, the tools, or the desire to spend a Saturday troubleshooting your sprinkler system. We can typically perform a full startup, inspection, and adjustment in about an hour, leaving you with a perfectly tuned system and a report of any needed repairs.
There's no shame in calling for help. A professional startup ensures everything is checked, adjusted, and programmed correctly from the get-go, setting you up for a hassle-free season.
The Bottom Line
A well-maintained irrigation system is a major asset to your home, keeping your lawn healthy and boosting your curb appeal. But here in South Dakota, it's an asset that needs to be treated with respect after our harsh winters. By taking a slow, methodical approach to your spring irrigation startup—waiting for the right time, pressurizing the system gently, and conducting a thorough zone-by-zone inspection—you protect that investment. A little patience in May prevents a world of frustration and costly repairs in July. Your lawn, and your water bill, will thank you for it.